Deep acne scars such as ice pick and boxcar lesions require targeted approaches that balance effectiveness with safety. This guide reviews non‑invasive and minimally invasive office options — microneedling (including RF), fractional lasers, chemical peels, LED and adjuncts — detailing indications, realistic outcomes, downtime, risks, and combination strategies so you can set expectations and choose the right provider.
Understanding deep acne scars and realistic treatment goals
Before booking a single laser session or buying a package of microneedling treatments, you have to understand what is actually happening under the skin. Acne scarring is not just a texture issue; it is a structural change in the dermis caused by the destruction of the follicular unit during severe inflammation. The body rushes to repair the damage, often producing too little collagen (atrophic scars) or too much (hypertrophic scars).
Most patients seeking non-invasive treatments are dealing with atrophic scars, where there is a net loss of tissue. However, treating a deep “ice pick” scar the same way as a broad “rolling” scar is the primary reason many patients feel they wasted money on procedures that didn’t work.
Morphology Matters: Ice Pick, Boxcar, and Rolling Scars
Clinical success depends entirely on correctly identifying the scar type. Most patients have a mix, but the dominant type dictates the initial approach.
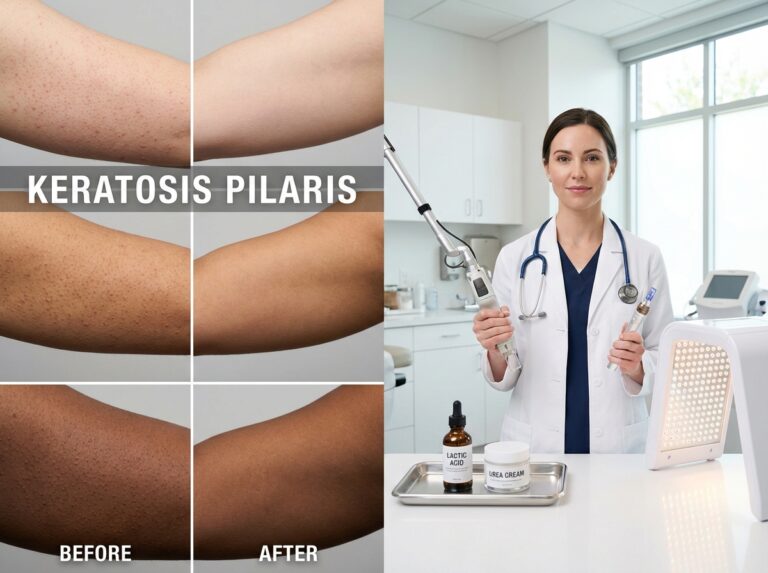
Ice Pick Scars are the most challenging to treat with general resurfacing. They are narrow (usually less than 2mm) but extend deep into the dermis or even the subcutaneous tissue. They have a sharp, V-shaped cross-section. Because the base of the scar is so deep, standard lasers and microneedling pens often cannot reach the bottom of the defect to trigger remodeling. The surface skin might improve, but the pit remains. These typically require focal chemical techniques or surgical punch excision before general resurfacing begins.
Boxcar Scars are wider (1.5 to 4mm) and have distinct vertical edges with a flat, U-shaped base. Unlike ice pick scars, the base of a boxcar scar is usually within the mid-dermis. This makes them more responsive to fractional lasers and RF microneedling, which can penetrate to that depth and stimulate the collagen required to “lift” the floor of the scar.
Rolling Scars are the widest (4mm or more) and give the skin a wave-like or undulating appearance. The key feature here is not just tissue loss, but dermal tethering. Fibrous bands (septae) pull the epidermis down, anchoring it to deeper structures. Unless these tethers are released—often through a mechanical technique called subcision—volumizing treatments or lasers will have limited effect because the skin is physically held down.
Assessing Severity: Validated Tools
Dermatologists use specific scales to track progress, and understanding them helps manage expectations. The Goodman & Baron Qualitative Scale is the clinical standard:
- Grade 1: Macular scarring (flat marks, red or brown spots) that are visible but not depressed.
- Grade 2: Mild atrophy that is not visible at social distances (50cm or more) and can be covered by makeup.
- Grade 3: Moderate scarring visible at social distances; not easily covered by makeup but flattens when the skin is stretched manually.
- Grade 4: Severe scarring that is obvious at social distances and does not flatten when the skin is stretched (indicating significant fibrosis or depth).
For a more objective approach, providers may use scar counting, where the number of ice pick, boxcar, and rolling scars are tallied before and after a treatment series. This prevents the vague feeling of “I think it looks better” and replaces it with data.
Fitzpatrick Skin Type and Safety
Your skin’s ability to handle heat and trauma is determined by its melanin content, classified by the Fitzpatrick scale (Types I–VI). This is the single most critical safety factor.
Patients with Fitzpatrick types IV–VI (light brown to black skin) have hyperactive melanocytes. Any inflammation—whether from acne or a laser beam—can trigger Post-Inflammatory Hyperpigmentation (PIH). This darkening can last months and is sometimes more distressing than the scars themselves.
For darker skin, the margin for error is slim. Aggressive ablative lasers (like traditional CO2) carry a high risk of PIH. Instead, the industry has shifted toward radiofrequency (RF) microneedling and non-ablative lasers, which bypass the epidermis to heat the dermis directly. Recent market data highlights this shift; the Scar Treatment Market Size & Share | Industry Report notes the increasing FDA clearances for devices specifically designed for safety across all Fitzpatrick types, such as the AVAVA platform.
Realistic Goals: Improvement vs. Elimination
The conversation about outcomes needs to be honest. Non-invasive therapy aims for substantial improvement, not perfection. A realistic goal is a 30% to 60% reduction in scar visibility after a full series of treatments.
Complete elimination of deep scarring is rarely possible without surgical intervention. Patients expecting “glass skin” after three sessions of microneedling will be disappointed. However, converting a Grade 4 scar to a Grade 2 scar makes a massive difference in how light reflects off the face and how easily makeup applies.
When to choose surgical or focal options:
If you have deep ice pick scars, a “non-invasive only” approach will likely fail. These usually require TCA CROSS (applying high-concentration trichloroacetic acid precisely into the scar pore) or punch excision (surgically removing the scar and stitching the skin) before starting laser or RF treatments. Similarly, deep rolling scars often require subcision to cut the fibrous tethers before energy devices can smooth the surface.
Pre-Treatment Evaluation and Preparation
Before any device touches the skin, a thorough evaluation is necessary.
1. Control Active Acne: You cannot treat scars while active acne is still creating new ones. Inflammation increases the risk of infection and PIH. Most dermatologists require the skin to be clear of active cysts for at least a few weeks.
2. Isotretinoin (Accutane) Timing: Historically, patients were told to wait 6 to 12 months after stopping isotretinoin before having procedures. Guidelines have evolved significantly. While aggressive full-face ablation still requires a waiting period, many experts now perform minimally invasive treatments (like superficial microneedling) sooner, based on an individualized risk assessment.
3. Pre-Treatment Skincare: To prevent pigment issues, patients—especially those with darker skin—should start a “priming” regimen 4 to 8 weeks prior. This typically includes a tyrosinase inhibitor (like hydroquinone or tranexamic acid) and a retinoid to stabilize melanocytes and speed up cell turnover.
4. Photography: Standardized photos at 90°, 45°, and 0° angles with consistent lighting are mandatory. Shadows exaggerate scars, so inconsistent lighting can make results look better (or worse) than they really are.
Algorithm for Selecting Initial Modalities
Based on the dominant scar type and skin tone, here is a practical framework for where to begin:
Scenario A: Dominant Ice Pick Scars
- Step 1: Focal treatment. TCA CROSS or Punch Excision.
- Step 2: Once healed, proceed to resurfacing (RF Microneedling or Fractional Laser) to blend the texture.
Scenario B: Dominant Boxcar Scars (Fair Skin, Types I-III)
- Primary Option: Fractional CO2 Laser or Erbium Laser for maximum remodeling.
- Alternative: RF Microneedling if downtime is a concern.
Scenario C: Dominant Boxcar Scars (Darker Skin, Types IV-VI)
- Primary Option: RF Microneedling (insulated needles preferred) or Non-Ablative Fractional Laser.
- Pre-treatment: Strict sun avoidance and tyrosinase inhibitors are required.
Scenario D: Dominant Rolling Scars
- Step 1: Subcision to release tethering.
- Step 2: Dermal Fillers (HA or biostimulators) to replace lost volume.
- Step 3: Energy devices to smooth surface irregularities.
Understanding these distinctions prevents the “one size fits all” error. Once the scar type is matched to the right modality, we can look specifically at how collagen induction therapies like microneedling function to repair the damage.
Microneedling and RF microneedling mechanisms protocols and outcomes
Microneedling and radiofrequency (RF) microneedling sit at the center of modern scar revision. These treatments rely on the body’s own healing mechanisms to remodel tissue. You might hear this called collagen induction therapy. The concept is simple: we create controlled damage to stimulate repair.
Mechanism of Action and Device Differences
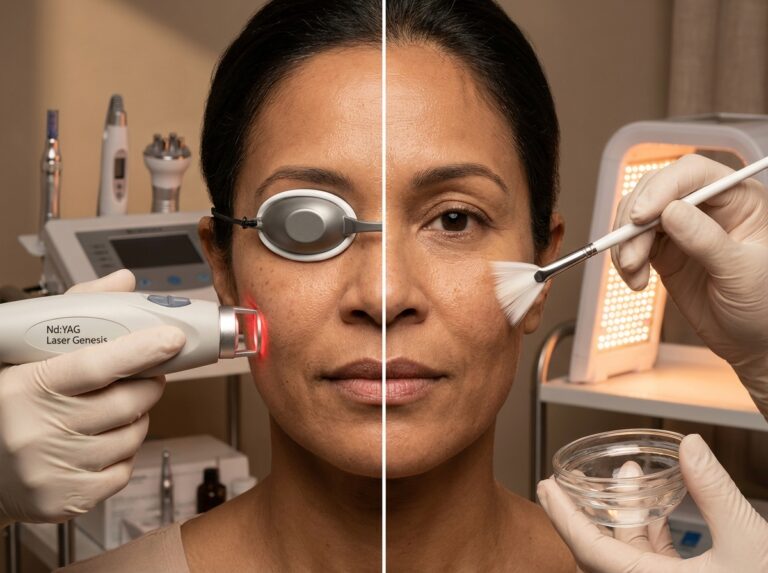
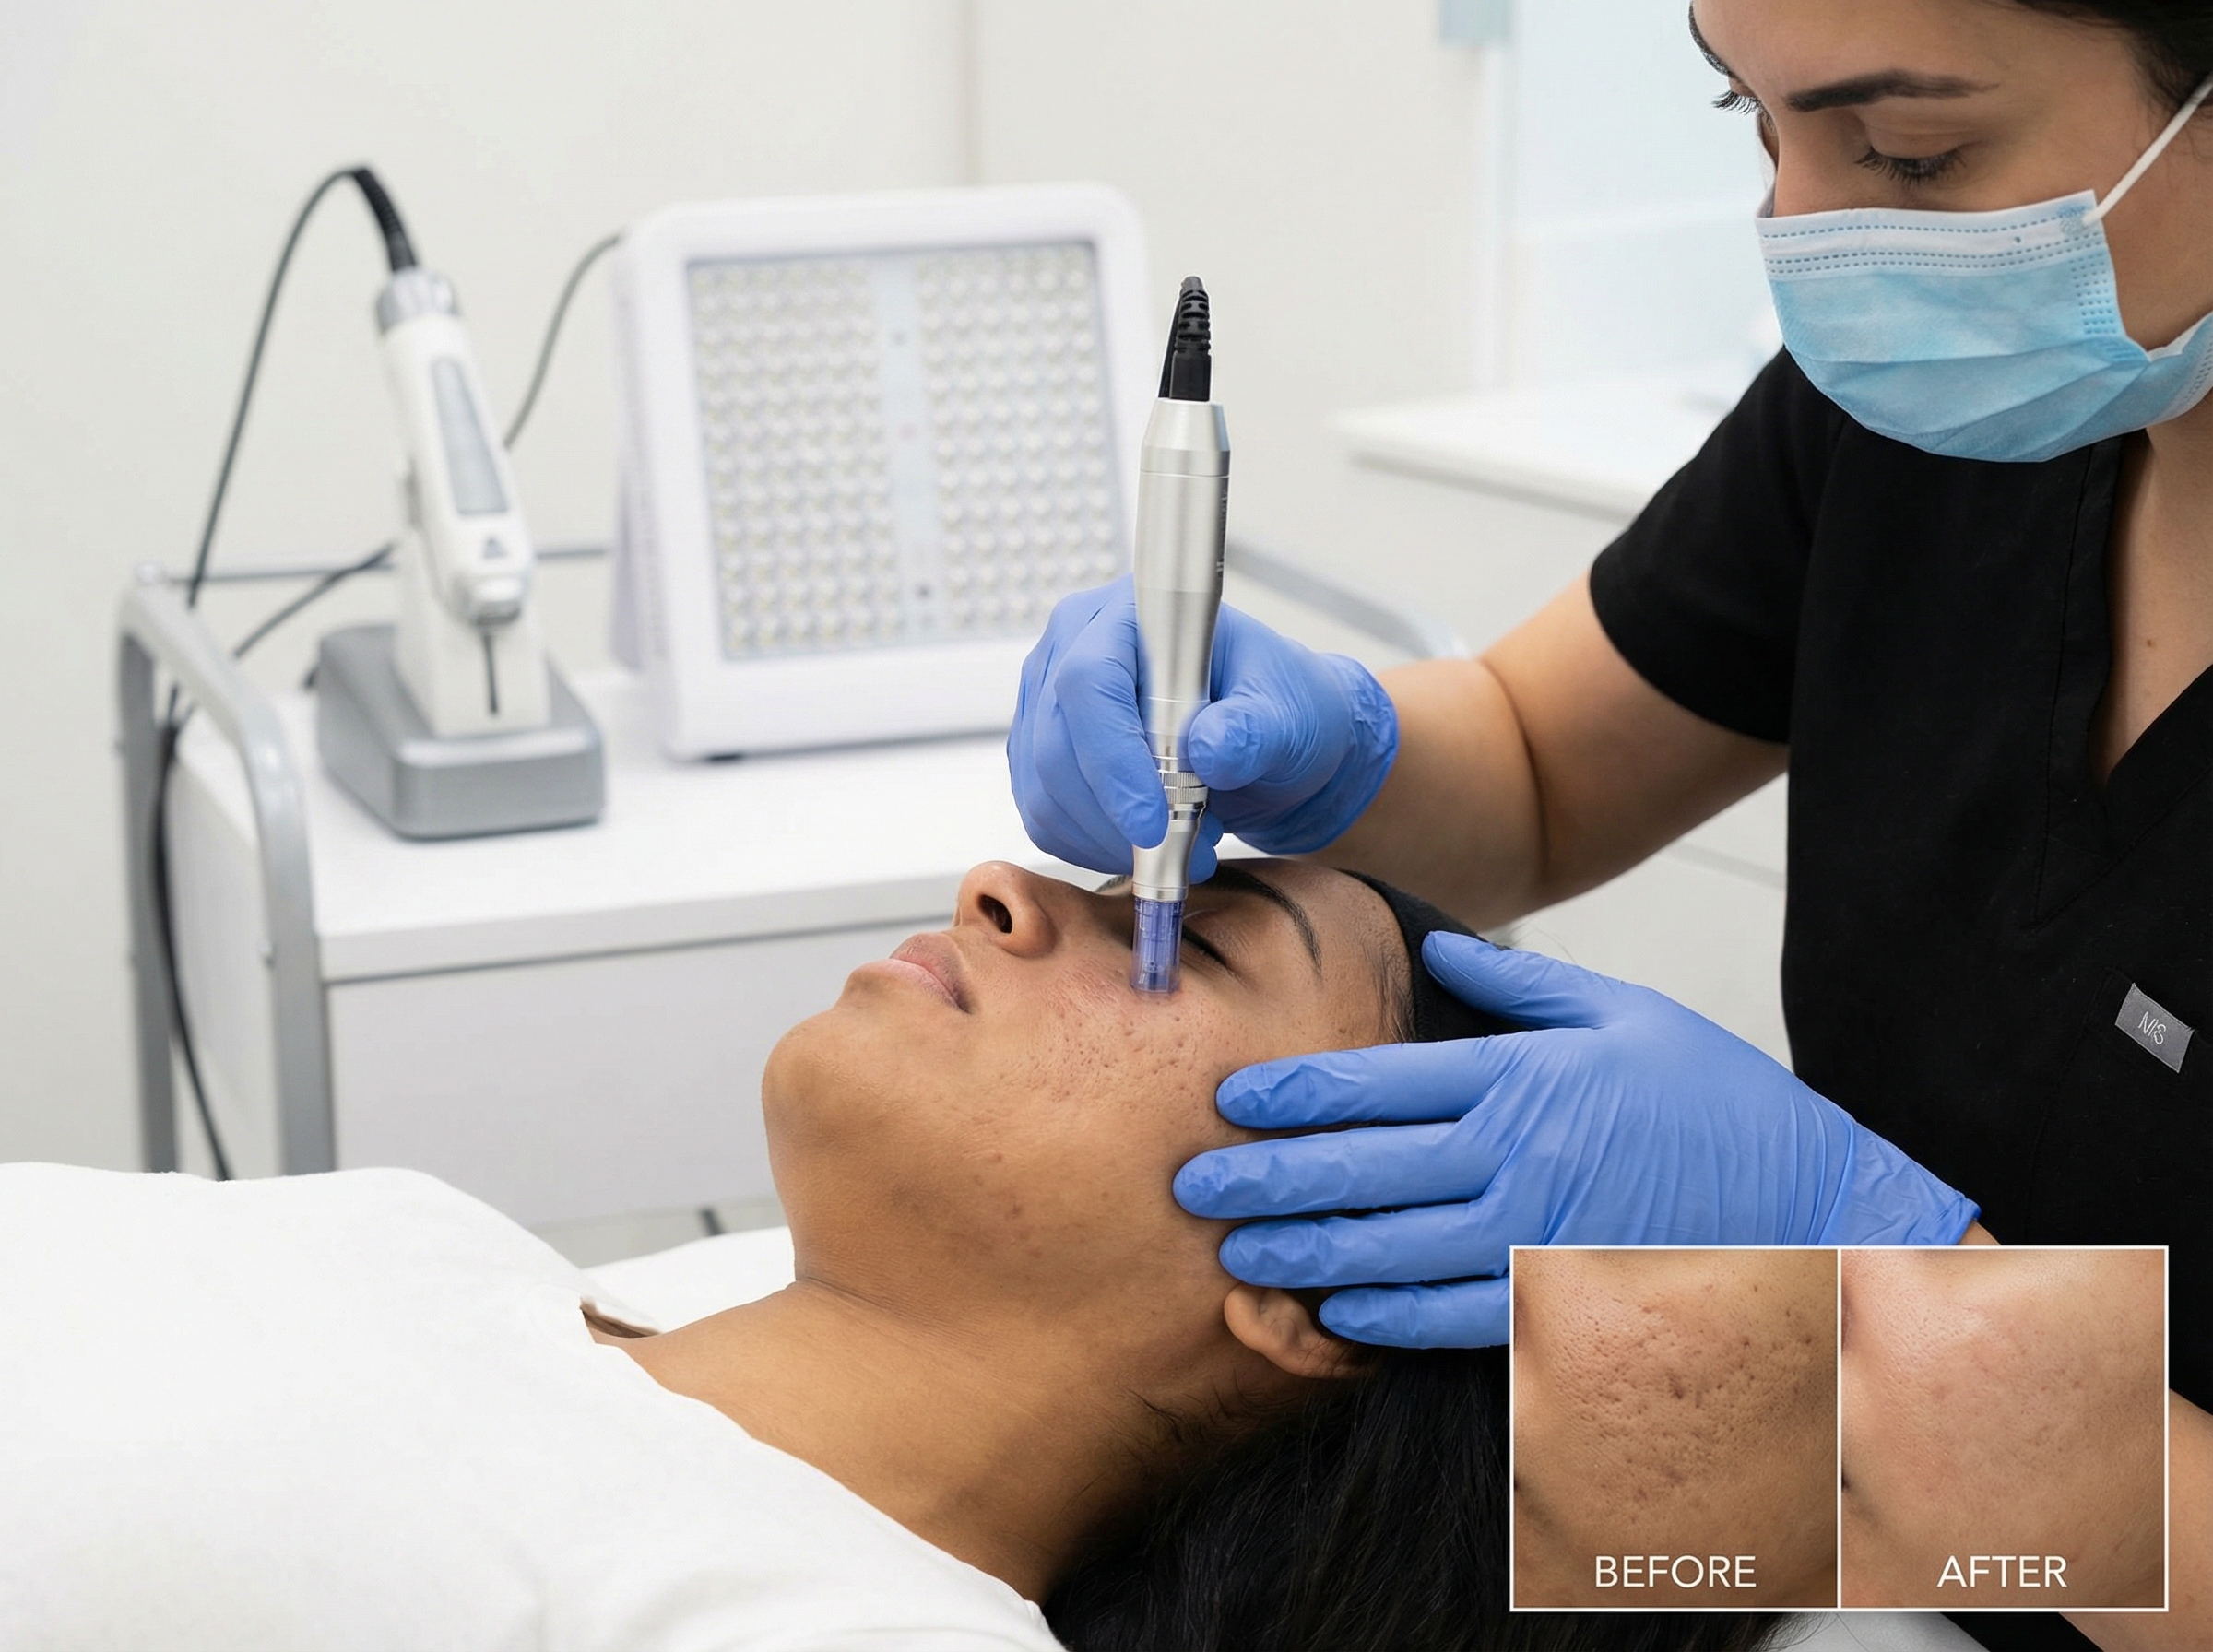
Standard microneedling uses a pen-like device equipped with sterile, single-use needle cartridges. These needles mechanically puncture the skin at high speed, creating thousands of microscopic channels. This physical trauma triggers a wound-healing cascade. The body releases growth factors and produces new collagen and elastin to repair the perceived injury, gradually thickening the dermis and softening scar edges.
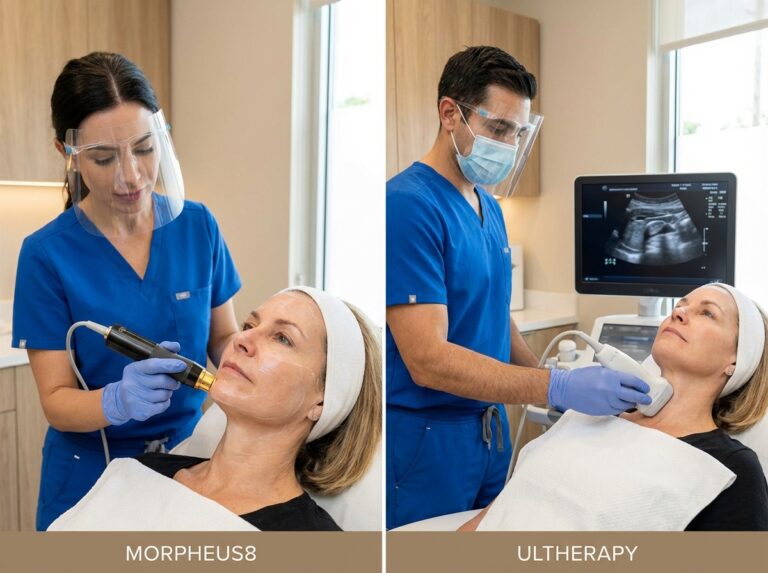
RF microneedling adds a thermal element to this mechanical injury. The needles penetrate the skin and then release radiofrequency energy at the tip. This energy creates zones of thermal coagulation in the dermis. The heat causes immediate tissue contraction and stimulates more robust collagen production than needling alone.
The depth capabilities differ between these tools. Superficial microneedling typically operates between 0.5 mm and 1.5 mm, targeting texture and shallow scarring. Medical-grade devices go deeper, reaching 2.0 mm to 2.5 mm. RF microneedling devices often penetrate up to 3.5 mm or even 4.0 mm. This extra depth allows providers to target the deep reticular dermis where tethered scar tissue resides.
Effectiveness on Ice Pick Versus Boxcar Scars
Device selection depends heavily on scar morphology. Boxcar scars usually have a flat base and distinct edges. They respond well to both modalities because the needles can penetrate the scar base and break up the fibrosis. RF microneedling is generally superior here; the heat helps remodel the collagen at the base of the boxcar scar more effectively. You can expect improvement ranges of 30% to 70% for boxcar scars after a full series of RF treatments.
Ice pick scars present a harder challenge. They are narrow, V-shaped, and often extend deep into the dermis or subcutaneous fat. The needles may not reach the bottom of these pits. Even if they do, the surrounding healthy tissue prevents the scar walls from collapsing and healing flat. Microneedling alone rarely eliminates ice pick scars, though it can soften them. Deep ice pick scars usually require focal chemical treatments like TCA CROSS before you start general resurfacing.
Protocols and Expected Outcomes
Patience is necessary for collagen remodeling. A typical protocol involves 3 to 6 sessions spaced 4 to 8 weeks apart. This interval allows the skin to heal and the new collagen to mature between treatments.
You will not see final results immediately. Early improvements in texture appear within a few weeks, but the real changes in scar depth take longer. Collagen remodeling continues for 3 to 12 months after your last session. Realistic goals involve substantial improvement rather than perfection. Most patients see a 30% to 60% reduction in scar visibility.
Combinations and Enhancements
We can enhance the effects of needling with topical agents. The microchannels created during treatment allow large molecules to penetrate the skin barrier.
Platelet-Rich Plasma (PRP)
This is the most common addition. The provider draws your blood and spins it to concentrate the platelets. This fluid is applied to the skin immediately after needling. The growth factors in PRP speed up healing and may boost collagen production. Evidence suggests it helps reduce redness and downtime.
Vitamin A Preconditioning
Using a topical retinoid for 4 to 6 weeks before treatment can be beneficial. It speeds up cell turnover and prepares the skin to heal. You must stop this a few days before the procedure to avoid excessive irritation.
Safety Guidance and Skin Types
Safety varies by skin tone. Standard microneedling is generally safe for all Fitzpatrick skin types. It does not generate heat, so the risk of post-inflammatory hyperpigmentation (PIH) is low.
RF microneedling requires more caution in darker skin (Fitzpatrick IV-VI). The heat can trigger pigment production. Devices with insulated needles are safer for these skin types. The insulation protects the epidermis from the heat while delivering energy to the dermis. Providers should use lower energy settings and perform test spots.
Contraindications
You cannot undergo these treatments if you have an active skin infection or active acne. Needling over active acne spreads bacteria and can cause a severe flare-up.
The Patient Experience: Pain and Downtime
Pain management is a priority. These are not painless procedures. A strong topical anesthetic is applied 30 to 60 minutes prior. For deep RF treatments, some providers use nerve blocks or offer oral anxiety medication.
Downtime is relatively short compared to lasers.
- Standard Microneedling: You will look sunburned for 24 to 48 hours. You might have pinpoint bleeding immediately after. Minor flaking occurs around day 3 or 4.
- RF Microneedling: Expect redness and swelling (edema). The swelling can last 2 to 5 days. You may see grid marks or tiny crusts that take a week to resolve.
Infection Control and Aftercare
Infection is rare but possible. The device must use a sterile, disposable cartridge. If you have a history of cold sores, your provider should prescribe antiviral prophylaxis.
Aftercare focuses on protection.
- Avoid the sun completely for the first week.
- Use a gentle cleanser and a bland moisturizer.
- Do not use active ingredients like acids or retinoids until the skin is fully healed.
- Apply broad-spectrum sunscreen daily once the microchannels close (usually after 24 hours).
Comparison of Microneedling Modalities
| Feature | Standard Microneedling | RF Microneedling |
|---|---|---|
| Primary Mechanism | Mechanical Micro-injury | Mechanical + Thermal Coagulation |
| Typical Depth | 0.5 mm – 2.5 mm | 0.5 mm – 4.0 mm |
| Best For | Texture, Rolling Scars, Pores | Deep Boxcar, Rolling Scars, Tightening |
| Pain Level | Mild to Moderate | Moderate to High |
| Downtime | 1–3 Days (Redness) | 2–5 Days (Redness & Swelling) |
| Cost Factor | Lower | Higher |
The demand for these treatments continues to rise. The global scar treatment market is projected to grow from USD 19.1 billion in 2025 to USD 43.5 billion by 2035. This growth drives innovation in device technology and safety features.
Providers and patients must align on expectations. These treatments improve scars; they do not erase them. A 50% improvement is a successful outcome. Consistent sessions and proper aftercare are the keys to achieving that result.
Laser facials and energy based devices for deep acne scars
While microneedling relies on physical trauma to stimulate repair, energy-based devices use light and heat to remodel the skin. This category is broad. It ranges from “lunchtime” laser facials with zero downtime to aggressive resurfacing that requires weeks of recovery. The right choice depends entirely on your scar type, skin tone, and how much time you can take off work.
Non-Ablative Fractional Lasers
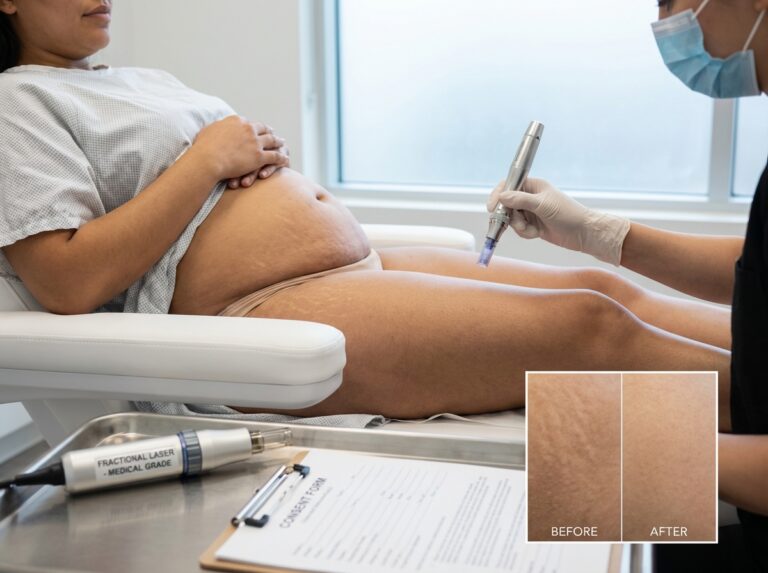
These devices are the middle ground for treating boxcar scars. Common wavelengths include 1540 nm and 1550 nm erbium glass. They work by creating microscopic thermal zones in the dermis. The laser heats columns of tissue to trigger collagen production, but it leaves the top layer of skin (epidermis) intact.
Because the surface is not broken, the risk of infection is low. You will look red and swollen for 2 to 5 days, similar to a bad sunburn. Makeup can usually cover this after 24 hours.
Expectations:
- Session Count: You typically need 3 to 6 treatments spaced 4 to 8 weeks apart.
- Results: Improvement is gradual. You might see a 20% to 50% improvement in shallow boxcar scars after a full series.
- Limitations: These lasers struggle with deep ice pick scars. The heat does not always reach the bottom of the narrow V-shape of an ice pick scar.
Ablative Fractional Lasers (CO2 and Er:YAG)
Ablative lasers are the heavy lifters. They vaporize columns of tissue, removing both the epidermis and parts of the dermis. This physical removal of scar tissue forces the skin to heal and pull together, which significantly smooths out texture.
CO2 Lasers (10,600 nm): These are often considered the gold standard for severe scarring. They deliver intense heat that tightens the skin while removing volume.
Er:YAG Lasers (2,940 nm): These are absorbed more efficiently by water in the skin. They allow for precise ablation with slightly less thermal damage to surrounding tissue, often resulting in faster healing than CO2.
The Trade-off:
Recovery is difficult. You will have oozing, crusting, and significant redness for 7 to 14 days. Residual pinkness can last for months. However, a single session can achieve what 4 to 6 non-ablative sessions achieve. Improvement ranges for boxcar scars often sit between 40% and 80%.
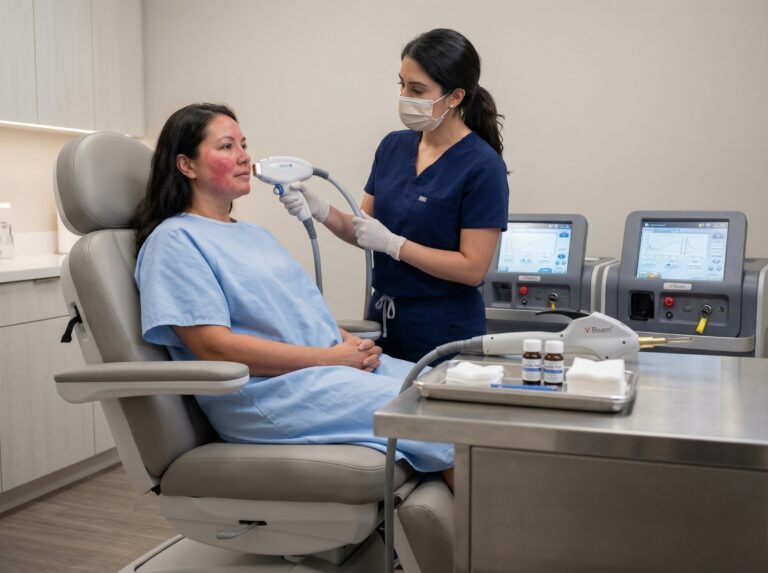
Treating Color: Picosecond, IPL, and PDL
Many patients confuse texture issues with color issues. If your scars are flat but red or brown, resurfacing lasers are not the primary tool.
Picosecond Lasers: These deliver energy in trillionths of a second. They create a photoacoustic effect (sound waves) rather than just heat. They are excellent for pigmentation and mild remodeling but do not remove deep scar volume like ablative lasers.
IPL (Intense Pulsed Light): This is not a laser but a broad-spectrum light. It targets brown pigment and redness. It does not fix skin indentations.
PDL (Pulsed Dye Laser): This targets oxyhemoglobin. It is the standard for reducing the persistent redness (erythema) often seen in fresh acne scars.
LED Phototherapy as an Adjunct
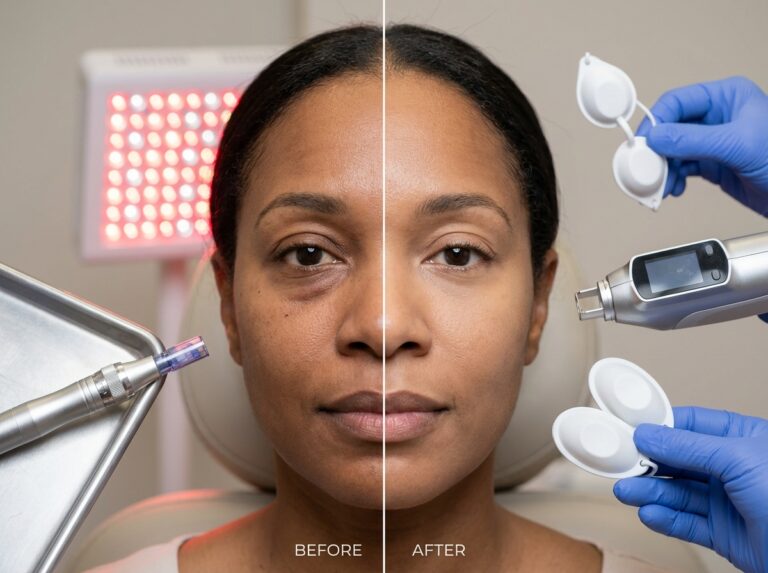
You will often see LED panels used after a laser session. Red (630–660 nm) and near-infrared (830–850 nm) light reduce inflammation and speed up re-epithelialization.
It is important to be realistic. LED therapy alone will not lift a depressed scar. It is a support tool to cut your downtime by a day or two and manage post-procedure discomfort.
Safety and Skin Tone Considerations
Heat poses a risk for darker skin types (Fitzpatrick IV-VI). The heat from a laser can trigger melanocytes, leading to Post-Inflammatory Hyperpigmentation (PIH). This means the laser meant to fix your scars could leave dark spots behind.
For Darker Skin:
- Non-ablative fractional lasers and RF microneedling are generally safer than fully ablative CO2.
- Newer technologies are adapting. For instance, the AVAVA platform (Miria) has received FDA clearance for a device specifically designed to treat acne scars safely across all skin types, including darker tones.
- Pre-treatment with hydroquinone or tranexamic acid for 4 to 8 weeks is often required to suppress pigment production before the laser touches your skin.
Comparison of Energy-Based Modalities
| Modality | Primary Target | Downtime | Pain Level | Best For |
|---|---|---|---|---|
| Non-Ablative Fractional | Dermal remodeling | 2–5 days (Redness) | Moderate | Shallow boxcar, texture |
| Ablative CO2 / Er:YAG | Vaporization & heat | 7–21 days (Crusting) | High | Deep boxcar, severe texture |
| Picosecond | Pigment & mild texture | 1–3 days (Pinkness) | Low/Mod | Pigmented scars, mild atrophy |
| Vascular (PDL) | Redness (Hemoglobin) | 0–2 days (Bruising) | Moderate | Red, flat scars |
Sequencing and Selection
Spending money wisely requires a plan. If you have deep ice pick scars, lasers alone will disappoint you. You should treat the ice pick scars with chemical methods (discussed in the next section) first. Once those are elevated, you can use lasers to smooth the remaining surface irregularities.
Timing Matters:
- Wait 2 to 4 weeks after microneedling before doing a non-ablative laser.
- Wait 3 to 6 months between aggressive ablative CO2 sessions to allow full collagen remodeling.
- If you combine lasers with fillers, most providers do the energy treatment first or wait until the filler has settled, though protocols vary.
Lasers are powerful tools for boxcar and rolling scars, but they are rarely a “one and done” solution. They work best when positioned correctly in a broader treatment plan that might also include chemical reconstruction and volume replacement.
Chemical peels topical adjuncts PRP and fillers in a multimodal plan
While lasers often get the spotlight for skin resurfacing, they are rarely a solo act when dealing with complex scarring. You cannot simply sand down the surface of the skin and expect deep pits or tethered indentations to disappear. This is where chemical reconstruction and volume replacement come into play. We need to look at how chemical agents, blood-derived growth factors, and injectable fillers work together to rebuild the skin structure from the bottom up.
Chemical Peels for Scarring
Chemical peels are not just for exfoliation. When we talk about scarring, we categorize peels by how deep they penetrate. Superficial peels using glycolic acid (20–70%) or salicylic acid (20–30%) are generally helpful for texture and active acne but do very little for deep boxcar or ice pick scars. They mostly polish the surface.
For actual scar depth reduction, we look at medium-depth peels. These typically use Trichloroacetic Acid (TCA) at concentrations between 20% and 35%, sometimes combined with Jessner’s solution. These peels penetrate the papillary dermis. They cause significant peeling and require about a week of downtime. They are effective for treating widespread shallow boxcar scars and improving overall skin texture, but they still struggle with the deep, narrow pits known as ice pick scars.
The TCA CROSS Technique
Ice pick scars are narrow, V-shaped, and extend deep into the dermis. Lasers often skip over them because the beam cannot reach the bottom of the pit without causing excessive damage to the surface. The solution is a technique called TCA CROSS (Chemical Reconstruction of Skin Scars).
A provider applies a high concentration of TCA (50–100%) directly into the base of the scar using a toothpick or a fine blunt instrument. This triggers a focal inflammatory reaction. The acid causes the proteins in the skin to denature, leading to “frosting” or whitening of the scar floor.
What to expect with CROSS:
- Immediate reaction: The treated spots turn white (frost) for a few minutes to hours.
- Crusting: Small scabs form at each treated point. These stay for 5 to 7 days. You must not pick them.
- Healing: As the scab falls off, the body produces new collagen that fills the pit from the bottom up.
- Sessions: Most patients need 3 to 6 treatments spaced roughly 4 to 6 weeks apart.
The main risk here is widening the scar if the acid spills onto the surrounding skin. There is also a risk of post-inflammatory hyperpigmentation (PIH), especially in darker skin tones.
Topical Preconditioning and Post-Care
You cannot treat deep scars aggressively without preparing the canvas. This is especially true for patients with Fitzpatrick skin types IV–VI. Preconditioning the skin reduces the risk of pigment complications.
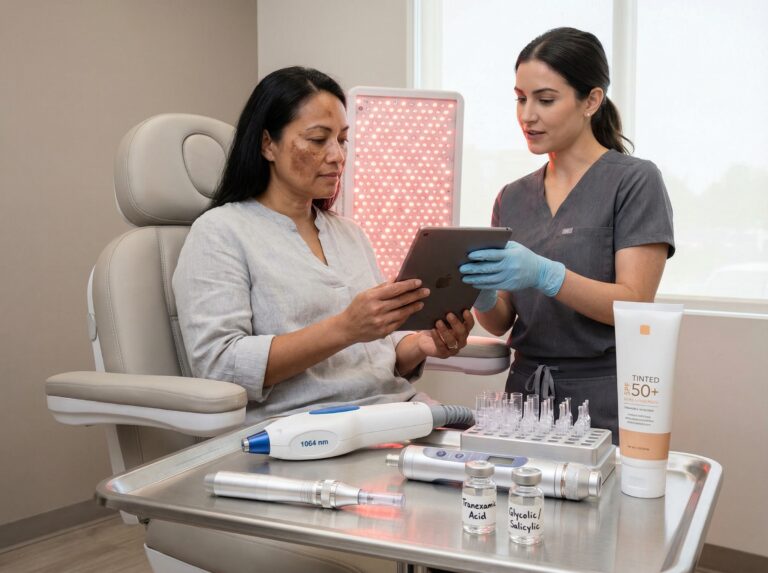
Providers often prescribe a topical retinoid (like tretinoin) for 4 to 12 weeks before the procedure. This speeds up cell turnover and helps the skin heal faster. For those prone to pigmentation, hydroquinone (2–4%) is applied nightly for several weeks prior to treatment to suppress melanin production.
After the procedure, the focus shifts to protection. Sun avoidance is non-negotiable. Using broad-spectrum sunscreen is critical to prevent the fresh collagen from darkening. If PIH occurs, ingredients like tranexamic acid, azelaic acid, or continued use of hydroquinone help fade the dark spots over time.
PRP as a Healing Accelerator
Platelet-Rich Plasma (PRP) has become a standard adjunct to microneedling and laser treatments. The concept is simple. The provider draws a small amount of your blood (10–60 mL) and spins it in a centrifuge to concentrate the platelets to 2–6 times their normal levels.
These platelets are packed with growth factors. When applied to the skin immediately after microneedling, they seep into the thousands of micro-channels created by the device. Evidence suggests that adding PRP can speed up recovery time, reduce redness, and improve the overall improvement in scar texture compared to microneedling alone. It is not a miracle cure that erases scars overnight, but it acts as a biological booster for the wound-healing process.
Dermal Fillers and Biostimulators
Resurfacing treats the skin quality, but it does not address volume loss. Atrophic scars, particularly rolling scars, are essentially empty spaces under the skin. Injectable treatments fill these voids.
| Product Type | Mechanism | Best For | Longevity |
|---|---|---|---|
| Hyaluronic Acid (HA) | Immediate volume replacement. | Boxcar and rolling scars that need instant lift. | 6 to 18 months. Reversible. |
| Poly-L-Lactic Acid (PLLA) | Biostimulator. Triggers collagen production over months. | Widespread rolling scars and general volume loss. | 2+ years. Gradual results. |
| Calcium Hydroxylapatite (CaHA) | Immediate lift plus long-term collagen scaffolding. | Deep, tethered scars. | 12 to 18 months. |
Fillers are rarely used as a standalone treatment for acne scars. They work best when combined with subcision.
Subcision and Sequencing Protocols
Rolling scars are caused by fibrous bands that pull the skin surface down toward the deeper tissue. If you fill on top of these bands without releasing them, the scar will remain tethered. Subcision involves inserting a needle or cannula under the scar to cut these fibrous septae. The skin snaps back up, and the depression lessens.
The ideal sequence for a multimodal plan often looks like this:
- Stage 1: Structural Release. Perform subcision to release the tethers. Inject filler immediately after to keep the space open and prevent the bands from reattaching.
- Stage 2: Focal Repair. Use TCA CROSS for any deep ice pick scars. This can be done in the same visit as subcision or separately.
- Stage 3: Surface Remodeling. Once the deep structures are improved, use RF microneedling or fractional lasers to smooth the surface texture and blend the edges.
This approach respects the anatomy of the scar. You fix the foundation before you sand the floor.
Safety, Costs, and Market Reality
Combining these treatments requires strict safety protocols. You generally wait 4 to 6 weeks between major sessions to allow the skin to heal. For darker skin types, the intervals might be longer, and the energy settings on devices lower.
Cost is a significant factor. Insurance considers these treatments cosmetic. A single syringe of filler can cost between $600 and $1,000. PRP add-ons usually run several hundred dollars. When you combine subcision, fillers, and energy devices, a total treatment plan often spans thousands of dollars.
Patients should look for board-certified dermatologists who offer a written plan. This plan should detail the sequence of treatments, the expected downtime (which varies from 2 days for fillers to 7+ days for aggressive peels), and a realistic cost estimate. There is no single “best” tool. The best results come from a provider who knows how to use the entire toolbox.
Conclusion results takeaways and next steps for patients
Making Sense of the Treatment Journey
We have covered a lot of ground regarding lasers, needles, and chemical agents. Treating deep acne scars is not as simple as buying a serum at the drugstore. It requires a strategy. Now that we have looked at the specific tools, we need to look at how to put them together into a coherent plan that actually delivers results without wrecking your skin or your bank account.
The most important thing to understand is that no single device is a magic wand. Most patients I see do not have just one type of scar. You likely have a “mixed topography”—a few deep ice pick scars on the cheeks, some boxcar scars on the temples, and maybe some rolling unevenness along the jawline. Because the scars are different, the treatment usually needs to be different too.
Matching the Method to the Scar
If you take only one thing away from this entire guide, let it be this: depth dictates the device.
Ice Pick Scars: These are the hardest to treat because they are narrow and deep, often reaching into the subcutaneous tissue. Running a laser over the surface often misses the bottom of the pit. The evidence is clear that focal treatments work best here. Techniques like TCA CROSS (applying high-concentration acid precisely into the scar) or punch excision are usually necessary before you even think about resurfacing.
Boxcar Scars: These are wider and have distinct edges. They respond much better to “field” treatments. This is where your fractional CO2 lasers, Erbium lasers, and RF microneedling devices shine. They can smooth out those sharp edges and stimulate the dermis to rise.
Rolling Scars: While we focused heavily on surface treatments, remember that rolling scars are often tethered down by fibers under the skin. You can laser the surface all day, but if you don’t release that tether (subcision) or add volume (fillers), the skin won’t snap back up.
The Power of Combination Therapy
Monotherapy—doing just one type of treatment over and over—is rarely the most efficient route for deep scarring. The current clinical consensus leans heavily toward combination therapy.
A logical sequence often looks like this:
- Phase 1: Focal treatment. Your provider targets the deep ice pick scars with TCA CROSS or performs subcision on tethered rolling scars.
- Phase 2: Volumization. If there is volume loss, they might place a small amount of filler to prop up the depressed areas.
- Phase 3: Resurfacing. Once the deep pits are addressed and the tethers released, you move on to RF microneedling or fractional laser to smooth the overall texture and blend the edges.
This approach takes time, but it generally yields higher patient satisfaction than trying to force one laser to do three different jobs.
Setting Realistic Expectations
We live in an era of filters and aggressive social media marketing, but you need to keep your feet on the ground. Non-invasive treatments are medical procedures, not miracles.
Improvement, Not Perfection:
The goal is significant improvement, typically in the range of 30% to 60% reduction in scar visibility. For many, this changes their life and restores their confidence. However, expecting 100% removal—”glass skin”—is a setup for disappointment. Even surgical intervention leaves a mark, albeit a less visible one.
The Timeline is Slow:
Collagen remodeling is a biological process that does not care about your schedule. When you get a laser treatment or microneedling, the immediate swelling might make your skin look plump for a few days. That goes away. The real structural change happens over 3 to 6 months as your body produces new collagen types I and III. You might finish your treatment series in March and not see the final result until September. Patience is mandatory.
Action Steps for Patients
If you are ready to move forward, here is your checklist to ensure you do it safely and effectively.
1. Control Active Acne First
Do not start expensive scar treatments if you are still breaking out. Inflamed acne is a contraindication for most resurfacing procedures because it spreads bacteria and increases the risk of infection. Plus, new breakouts mean new scars. Get your skin clear and stable for at least a few months before booking a laser session.
2. Vet Your Provider
This is not the time to look for a bargain. Lasers and medical-grade acids can cause permanent burns and disfigurement in untrained hands.
- Credentials: Look for a board-certified dermatologist or plastic surgeon. They have specific training in skin pathology and wound healing.
- Experience: Ask specifically how many acne scar patients they treat per month. Ask to see their own before-and-after photos, not stock images from the device manufacturer.
- Consultation: They should examine your skin under good lighting, identify your specific scar types (ice pick vs. boxcar), and propose a customized plan.
- Written Plan: Get the treatment plan in writing, including the estimated number of sessions, costs, and specific downtime instructions.
3. Discuss Your Skin Type and PIH Risk
If you have olive, brown, or black skin (Fitzpatrick types IV-VI), your risk for Post-Inflammatory Hyperpigmentation (PIH) is significantly higher. You must have a frank conversation about this during your consultation.
- Ask about “pre-conditioning” your skin with tyrosinase inhibitors (like hydroquinone or non-hydroquinone alternatives) for a few weeks before treatment.
- Ensure they are using safe devices. RF microneedling and specific non-ablative lasers are often safer for darker skin tones than aggressive CO2 lasers.
4. Budget for a Series
One session is rarely enough. Most non-invasive protocols require 3 to 6 sessions spaced 4 to 8 weeks apart. Insurance generally views this as cosmetic, so you will likely be paying out of pocket.
| Treatment Type | Estimated Cost Per Session (USA) | Notes |
|---|---|---|
| Microneedling (Mechanical) | $300 – $800 | Lower cost, but requires more sessions. |
| RF Microneedling | $800 – $1,500+ | Higher cost due to consumable tips and technology. |
| Non-Ablative Laser | $500 – $1,200 | Often sold in packages of 3 or 4. |
| Ablative Fractional CO2 | $1,500 – $4,000+ | Price often reflects the higher downtime and physician time. |
| TCA CROSS | $250 – $600 | Often charged based on the number of scars treated. |
Safety Reminders and Final Thoughts
As you embark on this, safety must be your priority.
Sun Protection is Non-Negotiable:
Treating your skin with lasers and then going out in the sun without protection is dangerous. It can lead to permanent hyperpigmentation. You need broad-spectrum SPF 30-50 every single day, rain or shine, especially in the weeks following a procedure.
Infection Prevention:
Follow your aftercare instructions religiously. If you are prone to cold sores (herpes simplex), tell your doctor. Resurfacing around the mouth can trigger a flare-up, which can lead to widespread scarring. Your doctor can prescribe a prophylactic antiviral medication to prevent this.
Treating acne scars is a partnership between you and your clinician. It requires shared decision-making, honest conversations about downtime, and a commitment to the process. The technology available today is better than it has ever been, offering real hope for smoothing out the past. Take your time, choose the right expert, and trust the process.
References
- Scar Treatment Market Demand & Trends 2025 to 2035 — The global scar treatment market will grow from USD 19.1 billion in 2025 to USD 43.5 billion by 2035, expanding at a CAGR of 8.7% in the forecast period.
- Acne Scar Treatment Market latest Trend Analysis | CAGR of 7.1% — Market Size: The acne scar treatment market is projected to reach USD 15.9 billion by 2033, growing from USD 8.0 billion in 2023. Market Growth: …
- Scar Treatment Market Analysis, Size, and Forecast 2025-2029 — Scar Treatment Market Size 2025-2029. The scar treatment market size is forecast to increase by USD 18.59 billion, at a CAGR of 10.6% between 2024 and 2029.
- Scar Treatment Market Size, Share & Statistics Report, 2032 — The global scar treatment market is predicted to reach a value of US$ 20.6 Bn by 2025. It is anticipated to experience a CAGR of 11.5% during the forecast …
- Scar Treatment Market Size & Share | Industry Report, 2033 — Scar treatment market size was estimated at $2.85 billion in 2025, is projected to reach $6.45 billion by 2033, growing at a CAGR of 10.6% from 2026 to …
- Acne Scar Treatment Market Size, Share, Trends, Report 2035 — As per MRFR analysis, the Acne Scar Treatment Market was estimated at 3.886 USD Billion in 2024. The Acne Scar Treatment industry is projected to grow from …
- Scar Treatment Market Size to Hit USD 76.20 Bn By 2034 — The global scar treatment market size was calculated at USD 32.29 billion in 2025 and is projected to hit around USD 76.20 billion by 2034 …
- Advancements in Acne Scar Treatment: Exploring Novel Therapies — The treatment of acne scars remains a controversial topic, with an increasing demand from patients for a less invasive approach with consistent …
- A Single‐Center, Open Label, Study to Evaluate the Effectiveness of … — Data show that 72.5% of subjects had smoother skin and reduced hyperpigmentation (as per observer grading of photographs) and redness at the …
Legal Disclaimers & Brand Notices
The content provided in this article is for informational and educational purposes only and does not constitute professional medical advice, diagnosis, or treatment. Always seek the advice of a board-certified dermatologist, plastic surgeon, or other qualified healthcare provider with any questions you may have regarding a medical condition or specific aesthetic procedure. Never disregard professional medical advice or delay in seeking it because of something you have read in this article.
All product names, logos, and brands mentioned in this text are the property of their respective owners. All company, product, and service names used in this article are for identification purposes only. Use of these names, logos, and brands does not imply endorsement, affiliation, or certification by the trademark owners.